Guide
How to install a robot mower (wired and wire-free)
Installing a robot mower comes down to three jobs: putting the charging station in the right place with safe power, telling the mower where the lawn ends (with wire, or by mapping it in an app), and setting a sensible schedule. This guide walks through each step for wired, RTK, network RTK, vision and LiDAR mowers, with the mistakes to avoid.

Before you start
A bit of planning saves most installation headaches. Before unpacking anything:
- Measure the lawn. Use our lawn size tool and check the total is comfortably inside the mower's rated area.
- Find the narrow bits. Measure every gap the mower must pass through, such as a side return or a gap between beds, at its narrowest point.
- Note slopes, drops and water. Steep banks, retaining walls, ponds and paddling pools need extra care. See robot mowers on slopes.
- Check signal if your mower uses network RTK: see network RTK and 4G.
- Cut the lawn short with an ordinary mower a day or two before. Robot mowers are designed to maintain short grass, and wire is easier to lay on a short lawn.
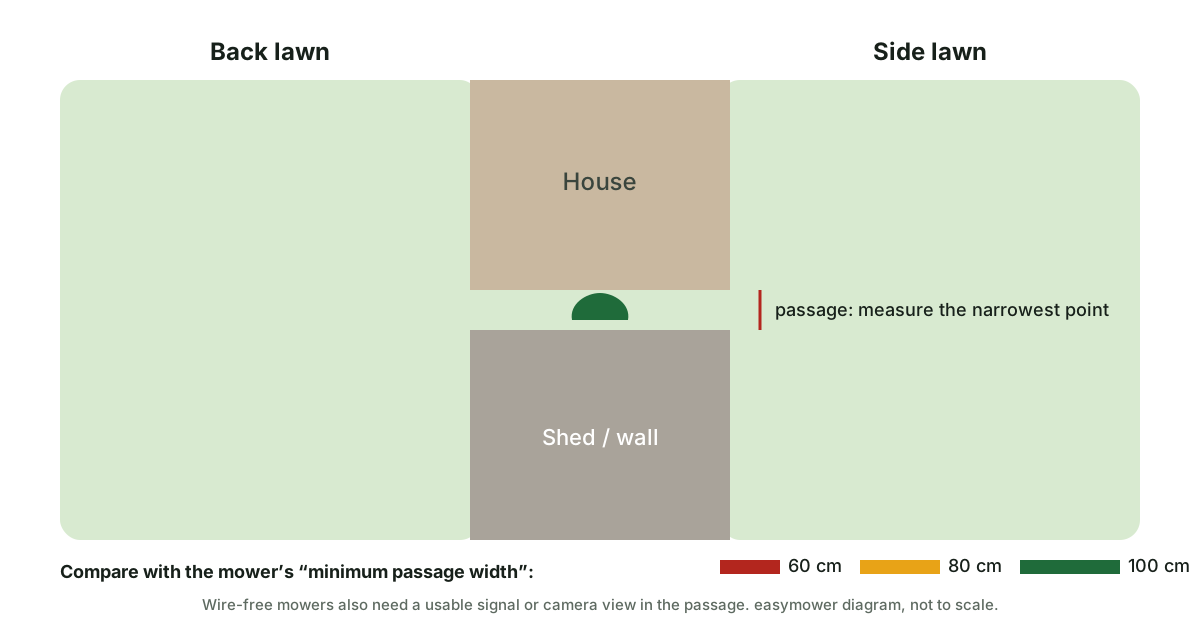
Manufacturers state a minimum passage width for many models. It varies widely: Flymo gives 60 cm for the Flymo EasiLife, while Navimow gives 100 cm for the Navimow i Series. Leave some margin: a passage that's exactly the minimum width leaves no room for error. Our complex gardens guide covers passages in more detail.
Step 1: choose the charging station spot
The charging station is the mower's home, so its position affects everything else. Look for somewhere:
- Flat and level, on the lawn or right at its edge, not on a slope or in a dip where water collects.
- With clear space in front and behind so the mower can drive straight in and out. The manual gives the distances.
- Near power, without a long run of cable across paths.
- Sheltered if possible. Out of the midday sun and the worst of the weather. A garage or cover can help; see do you need a robot mower garage?
- Out of sight from the street, to reduce the risk of theft.
- For RTK mowers, in a spot with a reasonable view of the sky. For wired mowers, where the boundary wire can connect to it easily.
Step 2: sort out the power
Charging stations run on low voltage. Most mowers come with a power supply that has a standard UK three-pin plug and a long low-voltage cable to the station. Where the power supply can go depends on the model; many manuals say to keep it under cover, such as in a garage, shed or porch, or mounted on a wall off the ground. Follow your mower's manual.
If there's no suitable socket, you'll need one fitted. Outdoor sockets should be weatherproof and protected by an RCD (residual current device), which cuts the power quickly if there's a fault. Electrical Safety First explains why RCD protection matters. Have a qualified, registered electrician do the work. Don't run a household extension lead across the lawn.
Step 3a: installing a wired mower
If your mower uses a perimeter wire, such as the Husqvarna Automower 305 or the Flymo EasiLife, the job is to lay one continuous loop of wire that starts and ends at the charging station.
Plan the route. Sketch the lawn and mark where the wire goes. It runs around the outer edge and out and back around anything the mower should avoid, such as island beds, ponds or the base of a tree. The two runs of an "island" loop lie side by side, so the mower ignores them when crossing between areas.
Set the distance from the edge. The manual gives how far in from the edge to lay the wire, and it depends on what's beyond: more space next to a wall or a flowerbed, less next to a flush path the mower can safely run onto. Getting this right decides how close to the edge the mower cuts.
Lay the wire. Either:
- Peg it to the surface with the supplied pegs, keeping it tight to the ground so the mower can't catch it. The grass grows over it within weeks. Quick, and easy to adjust.
- Bury it just under the surface with a spade or a lawn edger, or a hired cable-laying machine for big lawns. Takes longer, but protects the wire if you scarify or aerate, and from edging tools and animals.
Add a guide wire if needed. Many wired mowers use a separate guide wire, running from the station out across the lawn, to help the mower find its way home or through narrow passages. Follow the manual's layout.
Handle corners and passages. Avoid sharp corners, which the mower can struggle to follow, and keep the wire the right distance apart through passages so the mower can pass between the two runs.
Join and connect. Use the waterproof connectors supplied for any joins; ordinary twisted wires and tape corrode outside. Connect both ends to the station and check the indicator shows an unbroken loop.
Leave some slack. A few spare loops of wire at points where you might later extend or move a bed saves re-laying wire.
Step 3b: installing a wire-free mower
The details depend on the navigation type, but the shape of the job is the same: place the station, map the lawn by driving the mower round it, then add no-go zones and paths.
RTK with a base station. Mowers such as the Stiga A 4 and A 8 come with a base or reference station. It needs:
- the widest possible view of the sky, clear of trees and away from tall walls;
- mounting high enough to see over nearby obstacles, typically on a pole or a wall bracket;
- mains power, and a position within the range the manufacturer states.
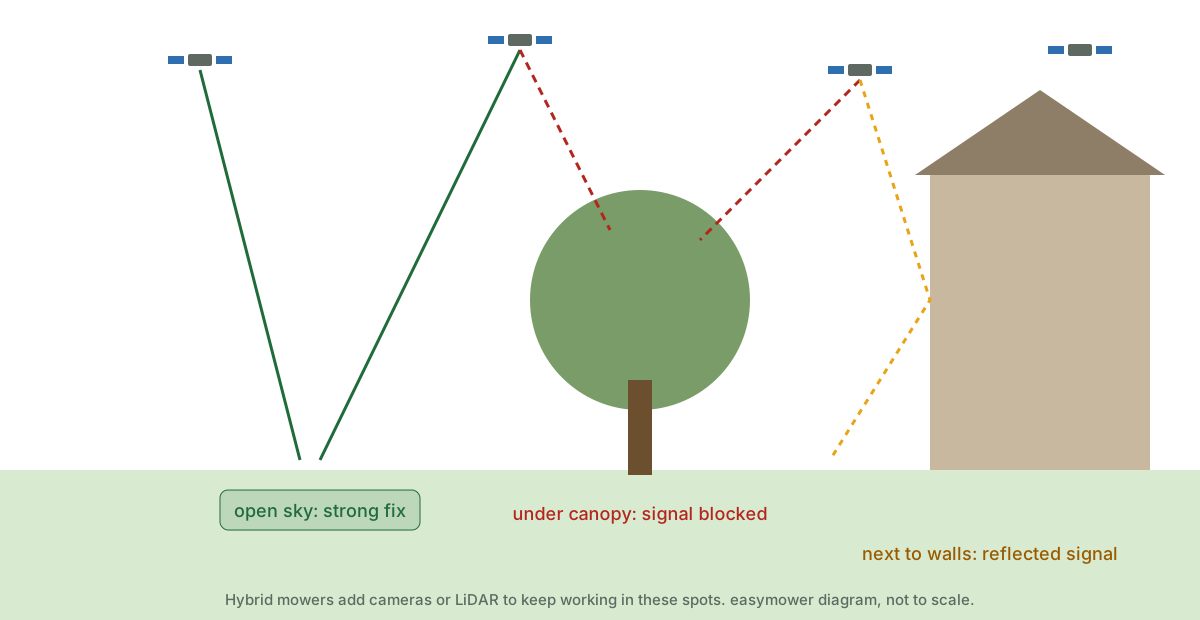
Network RTK. No base station, but the mower needs mobile or Wi-Fi coverage. Activate its SIM or connect it to your network in the app, then check the app shows a good positioning fix before you start mapping.
Vision and LiDAR. No satellite setup at all. Some camera mowers find the lawn edge themselves; LiDAR mowers such as the Dreame A1 Pro build their map while you drive them round. Make sure the lawn edges are clear and visible, and map in good daylight for camera models.
Mapping tips
- Drive slowly and steadily round the edge with the app's remote control. Keep the wheels just inside the lawn edge.
- Start and finish at the same point so the boundary closes cleanly.
- Map no-go zones around beds, ponds, trees with exposed roots, and anything else the mower should avoid.
- Add channels or paths between separate lawns. Most apps let you draw a narrow route that the mower uses only to travel, not to mow.
- Check the map on screen afterwards and fix any wobbly edges.
- Re-map after big changes such as a new bed or a moved shed.
Some mowers, such as the Mammotion LUBA mini 2 AWD, combine satellite positioning with cameras or LiDAR. Map them with good sky view and good light for the best result.
Step 4: first runs and settings
- Start high. Set the cutting height a notch or two above your target and lower it over a couple of weeks, especially after winter.
- Watch the first few runs. Look for spots it misses, places it gets stuck, and edges it cuts too close or too far. Adjust the wire or the map.
- Set a schedule that fits how you use the garden. Mowers generally need to run on several days a week.
- Mow in daylight. Hedgehogs and other wildlife are active at night, and the British Hedgehog Preservation Society is among those advising against night mowing. See robot mowers and hedgehogs.
- Turn on security: a PIN code, alarm and, if available, GPS tracking. See theft and security.
- Set rain behaviour if your mower has a rain sensor or weather setting.
DIY or dealer installation?
Most wired and wire-free mowers are designed for DIY installation. Some brands sell mainly through dealers who can install the mower for you, and some tie longer warranties to dealer registration and servicing. Honda, for example, makes the five-year domestic warranty on its Miimo range conditional on this. A dealer installation costs extra, but can be worth it for a big or awkward garden, or if you'd rather not spend a day on your knees with a bag of pegs.
Common mistakes to avoid
- A charging station on a slope or in a hollow.
- Wire too close to a wall or bed, so the mower bumps or drops a wheel over the edge.
- Passages that are exactly the minimum width.
- A base station tucked under a tree or beside the house.
- Mapping a camera mower at dusk.
- Leaving the power supply exposed to the weather when the manual says to keep it under cover.
Once it's installed, keep it running well with our winter storage and maintenance guide and blade guide. If you haven't chosen a mower yet, the mower finder takes your lawn size, layout and slopes into account.
Frequently asked questions
How long does it take to install a robot mower?
A wire-free mower can often be mapped and running in an hour or two. A wired mower takes longer: for an average garden, allow most of a day to plan and lay the wire, more if you bury it or have lots of beds and trees to wire around.
Do I need an outdoor socket?
You need mains power near the charging station. Many mowers have a power supply with a UK plug that can sit indoors or in a shed or garage, with a low-voltage cable running out to the station. If you need a new outdoor socket, have a qualified electrician fit a weatherproof, RCD-protected one.
Can I install perimeter wire myself?
Yes. Most wired mowers are designed for DIY installation and come with wire, pegs, connectors and a guide in the box. Some brands, particularly those sold through dealers, offer professional installation for a fee.
Should I bury the perimeter wire or peg it?
Pegging is quicker and easier to adjust; the grass grows over it within a few weeks. Burying it just under the surface protects it from scarifiers, aerators, edging tools and animals. Follow your mower's manual for depth.
Where should I put an RTK base station?
Somewhere with the widest possible view of the sky, clear of trees and tall walls, usually mounted high on a pole or wall, within the range the manufacturer states, and near mains power.
In this guide
Models mentioned in this guide
With today’s lowest UK price and our score.

Husqvarna Automower 305
- Up to 600 m²
- Perimeter wire
- 40% slopes

Flymo EasiLife
- Up to 800 m²
- Perimeter wire
- 35% slopes

Segway Navimow i Series (i1)
- Up to 800 m²
- Hybrid (RTK + vision/LiDAR)
- 30% slopes

STIGA A-series (A 4 to A 1500)
- Up to 2,500 m²
- RTK (own base station)
- 45% slopes
 Mammotion
Mammotion LUBA mini 2 AWD
- Up to 1,500 m²
- Hybrid (RTK + vision/LiDAR)
- 80% slopes

Dreame A1 Pro
- Up to 2,000 m²
- LiDAR
- 45% slopes
Mower finder
Not sure which mower fits your garden?
Tell us your lawn size, slopes, trees and budget. The finder filters every current model down to the ones that fit, and explains why.
Measure your lawn on a map